For this project I decided to create a How To poster on how to pop popcorn with an air popper. First I researched currently existing How To posters. What I found was that most of them include words for instructions. I decided to include them in my research anyway because I could apply the styles and typography choices to my sketching and brainstorming.


After researching, I experimented with different angles and ways to approach the steps. I included more possible steps so I had options on which ones to end up with. With those photographs I sketched out thumbnail ideas. I explored different text placements as well as formations for the steps.


After sketching I created a couple of rough digital comps. I really liked a style I sketched out so I played with color and layout within that style for these two digitals. I feel like the style well captures the playfulness of popcorn and keeps it in a more mature light like using an air popper does.

Great post! I liked how you organized your research, very clever. I also liked your first digital sketch a lot. It is very simple and easy to understand. Perhaps the illustrations could be a little bigger. I did not like the second one as much, but only because the steps seem to go backwards (right to left) as you go from steps 1 to 5. Keep up the great work, your are doing great.
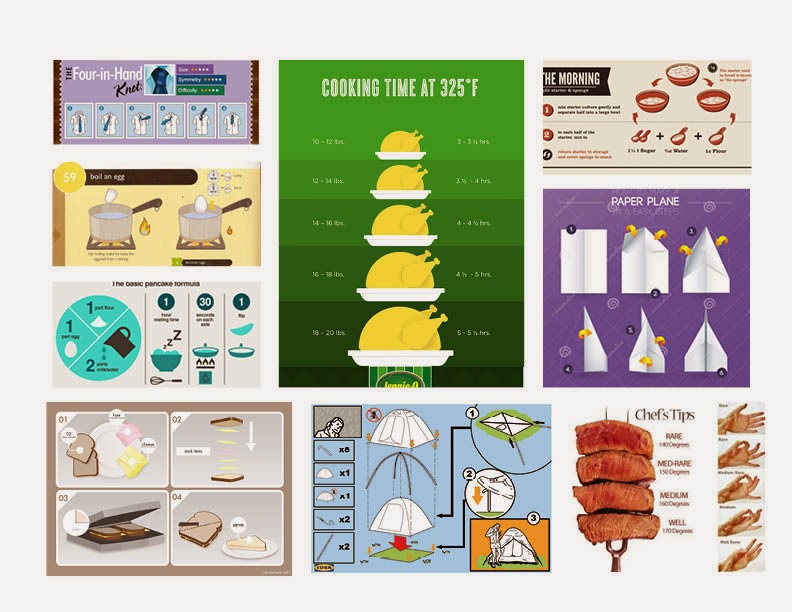
ReplyDeleteGreat work so far. It looks like you have 21 examples of your research, so not all 30 but the ones you found are great! Photographs of steps are missing (only includes steps 1 and 3. It seems that the images shown are all that is needed to complete the task, but I was confused by the labeling of “Step 1” and “Step 3” with a missing “Step 2” page. You have all of the other requirements, 12 sketches and 2 digital drafts.
ReplyDeleteFor me, it was difficult to understand the layout of the photographs. For “Step 1 - Kernels” it seemed that the photos at times were out of order. I just didn’t understand why you would be placing kernels in the machine and then taking them out to fill it again, unless you are showing how you measured the kernels that were placed in. If that is the case, I would suggest moving the photos that show the user filling up the measuring cup with kernels first and then have the photos with the kernels in the popcorn mission follow after. Without knowing the actual instructions and understanding your thought process, this sequence of steps just seems a little confusing.
CONTINUED....
On the other hand, the “Step 3 - Plug in” has great visual clarity. The photos help to illustrate every step and aspect of the steps needed to take in order to make popcorn. The structure of this step was much easier to follow. I liked that there were different angles and perspectives included however, I would also suggest grouping the same angle/perspective, this would create better consistency with the various views/angles that you took.
ReplyDeleteI think you have a really great start with these digital drafts. I agree that the playful colors and overall design helps to give a playful and youthful feel. For your poster designed on the right, I really like the consistent flow of the steps. It is very clear where each step is and in what sequence of steps is required to complete the task. While I like the consistent use of the banner design, I think their is a better and more effective way to display the step numbers if you even need to include them at all. Maybe try arrows or connecting lines. I saw a lot of other How-To posters incorporate these features in place of step numbers. I thought it was a great way to further eliminate words/numbers. Something I noticed was that you show the popcorn maker’s cord before showing the popcorn maker itself. I would suggest adding a step in between steps 2 and 3 to introduce the popcorn maker and display how you put the kernels in it. Maybe you could show the popcorn kernels being put into the maker similar to what you did in step 5. I would also suggest adding the same cord you show in step 3 within that new step. By showing that the popcorn maker has an electrical cord, step 3 will be more clear and understandable to your audience. I was initially confused what was being plugged in. I think that by adding this step, your audience can not only better understand how to complete the task but also realize what the cord goes to. I think all of the other steps work great in displaying the information. I especially like how you show the popcorn being popped into the bowl. I also liked the use of yellow in step 6. Displaying the butter in that way within the popcorn is great! For the second poster (the one on the right) the steps are the same however, the structure is a little confusing. I understand that you are trying to create movement and visual interest however, by starting the first step on the right, something feels off. I really liked the sketch you did that shows the final product in the middle and the steps surrounding the popcorn in a circle. I think that could be a fun way to display the steps in a unique and visually interesting way. Maybe you could encircle the entire circle in one being popcorn piece? I think by focusing on the audience and how they would be captivated by the design can help you refine this structure and layout. By paying attention to how to intrigue the audience, you can better the overall communication. Also placing yourself in the audience’s shoes will give you a better perspective what steps will be essential for them in order to complete the task.
CONTINUED
The only symbols you used throughout your designs are just the step numbers. Like I previously mentioned, I think adding either arrow or connecting lines could help create a solid path and structure to the design. While I really do like your use of the banners I think the design could be greatly improved if you tried a different way to display the numbers.
ReplyDeleteI think your color scheme works great in the way that it is fun, playful and includes yellow. I love the association you used with incorporating that color in your color scheme. I think your shapes and illustrations are all very consistent with each other. The typography used doesn't feel like the same weight or carry the same design aesthetic as your illustrations. I like the handwritten feel, but maybe a nice strong sans-serif font could helps get the same message across while still looking professional. Maybe try Gotham or Helvetica. Playing around with typography will help to elevate the design immensely. In terms of the background color, I think the brighter blue is fun but I wonder if there are too many colors in the color scheme. Perhaps trying a light/pale orange can give a more consistent feel without introducing a new color to the palette.
I think overall the design is well done. I really like the direction and theme you have created. The design elements were clearly created to help the user understand the structure of the task’s steps. I think this is definitely a fun design that helps to create an interesting and youthful feel. Great job!
DOH I don't know what I was thinking, I did all of the research, I only added a few of them for some reason I was thinking I only needed some to show I did it. Obviously that doesn't work well haha well I updated it with all of the pages of research.
ReplyDeleteMegan, I think that you have some really great things going on within your first two steps of your project. Your research is beautiful! I think that you laid it out really well and you found very informative infographics! The one thing I suggest doing for next time is finding research that is more applicable to the project itself. For instance, a lot of your research shows type, which is what we are trying to avoid in our projects!
ReplyDeleteThe key points and trends that you pointed out through your research is really beneficial for you as you go through the project. I think that it is important to notice what is done well within an instructional poster. Great job making sure you acknowledged what was important within different designs.
I do think that you showed waaaaay too many steps within your pictures that you took, but then I realized that your sketches of your poster did not show as many. So, way to be proactive and do a lot in the beginning so you can do little in the end! I feel like it would be beneficial for you to have a few different angles within your photos, though!
Your sketches look great! I think that I like the sketches that don’t have lines or grids to separate each individual step for what it is that you are doing. I think you effectively created a great looking poster without the grid in your digital sketches. I think that I prefer the digital sketch that shows the icons at an angle because it seems more interesting and intriguing.
Great post!
Megan,
ReplyDeleteI love your research! Great job on finding some really good how to posters!
Your process photos are really great! I’d suggest organizing them into view points. It’s much easier to tell how they work together. I think you’d benefit the most from a ¾ view. Arrange those photos into a single page and see what you think! I LOVE YOUR THUMBS UP PICTURE! Please use it in poster!
From your sketches I think you choose two of the strongest to do digitally. I’d like to see more sketches without so many dividing lines. I think a white space can do the job better than lines. Pushing that idea more could really help in your final digital versions.
Digital Sketch#1 The title is really fun! But I’d like to see the type fit in better with the shape you have behind it. Try pinteresting handlettering. They have some really good examples. I like the little banners with the numbers but they are working great just yet. But the shape of them more. You’ll get to a point that looks beautiful! I really like you side view! Keep it that way! I feel like step three should be step one?? Try a different background color. This one is too similar in value to the colors you have in the bowls. This is the stronger of the two digital sketches.
For you Digital Sketch #2 Same with the title on this one. I read left to right so I’d start with the angle on the left. Keep pushing the arrangement. It could work but try something a little different. The numbers are working but better here.
Keep working hard on this! You are going to make this beautiful!